
Modern campervans make off-grid living comfortable and convenient. Many people think off-grid camping means roughing it in the wilderness. Our tests show that current off-grid campervans generate up to 6 amps of solar power daily. This power runs LED lights efficiently, keeps your compressor fridge running, and maintains a stable 4G internet connection.
The right equipment makes off-grid living easier. My years of testing different setups have shown this clearly. Modern technology has changed everything about off-grid living – from lithium leisure batteries with full discharge capability to diesel heating systems that run on your vehicle’s fuel tank.
I’ve tested and verified 17 must-have items for your off-grid campervan in 2025. Each piece of equipment has proven its worth through extensive use. These items help you stay comfortable while enjoying the freedom of off-grid camping.
Solar Power System

A strong solar power system is the foundation of any off-grid campervan setup. Our tests show that monocrystalline solar panels are the most efficient option. These panels convert up to 40% more sunlight into usable power than their polycrystalline counterparts.
Monocrystalline panels need proper mounting to work their best. Rigid panels require a 25mm air gap underneath for cooling. Our research indicates that flexible panels also need some ventilation space to avoid overheating. The panel’s efficiency improves by 10-25% if you set the angle equal to your geographical latitude, rather than mounting them flat.
Lithium iron phosphate (LiFePO4) batteries stand out as the top choice for storage. These modern batteries are less than half the weight of traditional lead-acid options and can safely discharge almost completely. A 100Ah lithium battery matches the usable power of a 200Ah AGM battery effectively.
Safety comes first during installation. You must install a double-pole DC mini circuit breaker rated at minimum 250V between the solar panels and charge controller. The van’s chassis needs to ground all exposed metal components properly to eliminate electrical hazards.
A 100Ah battery packs roughly 1280 watts of power. The continental UK gets about 6 hours of sunlight daily, so you’ll need around 213 watts of solar panels for a full charge. The daily yield jumps from 490Wh in Edinburgh to 830Wh in southern Europe if you mount the panels at the right angle.
Portable Power Station

Portable power stations are now the go-to power solution for off-grid campervans. These compact units pack batteries, inverters, and charging capabilities into one portable package.
Power Station Capacity Guide
Your daily power needs determine which capacity works best for off-grid camping. A 300W portable power station charges a laptop 5 times or runs a CPAP machine for 4 hours. The 2000W models pack enough juice to power a small fridge for up to 24 hours.
Top Features to Think Over
You need these features for your off-grid campervan:
- Pure sine wave inverter that protects sensitive electronics
- Multiple USB and AC outputs
- LiFePO4 battery chemistry lasting 3,000+ charge cycles
- Built-in battery management system
Premium power stations now charge quickly, reaching 80% in just 33 minutes. Models with expandable capacity let you add extra battery packs when you need more power for longer trips.
Charging Methods
Power stations come with three ways to charge. Plugging into mains power takes 1.5 to 4 hours, perfect for quick top-ups at campsites. Solar charging depends on your panel size and weather – a 200W panel needs about 5.5 hours in good conditions. The most flexible setup combines solar panels with vehicle charging through the 12V socket.
New models include smart features like Bluetooth monitoring and app-based remote control. These features help you track and manage power better during long off-grid adventures.
Water Filtration System

Clean water is vital for off-grid campervan living. You need to understand water filtration systems to have safe, drinkable water while you explore remote locations.
Types of Water Philtres
Your campervan water system can use three main filtration methods. Mechanical filtration works like a physical strainer and removes particles down to 5 microns in size. Carbon filtration, especially when you have activated carbon blocks, removes chlorine, herbicides, and heavy metals through adsorption. UV purification uses germicidal ultraviolet wavelength that disrupts harmful bacteria DNA.
Installation Process
You need to place components strategically during installation. Mount the philtre after the water pump because placing it before the tank can lead to bacterial growth. The system works best when mounted near the sink for easy maintenance access. A proper setup has a cold water diverter and food-grade hoses rated at 1/2 inch BSP.
Maintenance Tips
Your filtration system needs regular maintenance to work well. You should replace mechanical philtres after 35 days of regular use. Carbon philtres need replacement after processing 3,000 litres of water. UV systems need new bulbs yearly, whatever the usage time.
Water Safety Guidelines
Stagnant water creates major risks in campervan systems. You should refresh tanks every three days to stop bacteria from growing. A point-of-use philtre at the kitchen tap will give an extra layer of protection for drinking water. Food-grade hoses prevent contamination from unsuitable materials when filling tanks.
Composting Toilet

Composting toilets are a game-changer in off-grid sanitation technology. These innovative systems work through an advanced waste separation mechanism that splits liquid and solid waste. This separation prevents odours and helps natural decomposition happen.
How Composting Toilets Work
The system uses a urine diverter to channel liquids into a separate container, while solids fall into a composting chamber. Users add natural materials like coconut coir or sawdust after each use to help decomposition. A built-in ventilation fan uses just 0.1 amp and keeps proper airflow to eliminate unwanted odours.
Installation Requirements
The unit needs proper placement and good ventilation. You must mount the unit securely to the van floor and connect a ventilation pipe that leads outside. The installation height should give at least 1.3 metres of clearance so you can use it comfortably. You should place the ventilation output under the van instead of on the side. This prevents wind from pushing air back at highway speeds.
Maintenance Schedule
Regular maintenance keeps these systems working at their best. You’ll need to empty the liquid container every 3-4 days if you’re the only user. The solids chamber can handle 30-60 uses before it needs emptying. A weekly cleaning routine should include:
- Wiping down the seat and bowl with natural cleaners
- Checking ventilation system functionality
- Rotating the composting material if equipped with an agitator
Environmental Benefits
These systems bring remarkable ecological advantages. They don’t use any water, unlike traditional flush toilets that use about 0.75 gallons per use. They also avoid the harmful chemicals found in conventional cassette toilets. The end product can even make soil richer when properly composted, creating an eco-friendly waste management solution.
12V Refrigeration

Reliable refrigeration is the life-blood of comfortable off-grid campervan living. Modern 12V compressor fridges are better than traditional absorption units and use up to 75% less power while keeping temperatures steady.
Energy-Efficient Fridge Options
Compressor fridges are the quickest way to cool things in off-grid setups. The Vitrifrigo C51i performs better than other models by reaching temperature faster and staying cooler. These units cycle on and off to keep the temperature stable and we only used power when cooling is needed.
Power Consumption Details
The power usage changes by a lot based on temperature and how you use the fridge. A good 50L compressor fridge uses:
- 24Ah per day at 20°C ambient temperature
- 40Ah per day at 30°C ambient temperature
- 80Ah per day at 40°C ambient temperature
Temperature Control Tips
Good ventilation is significant to get the best performance. Removing vent covers can improve efficiency by up to 50% when it’s hot outside. A ventilation fan can improve cooling when temperatures are higher than 32°C.
The fridge’s location makes a big difference – keeping it away from direct sunlight and making sure air flows around it can cut power use by 15-20%. You can optimise performance by cooling items before putting them in and keeping the door closed as much as possible to maintain stable temperatures.
Diesel Heater

Diesel heaters are a dependable heating solution for off-grid campervans that provide warmth in cold conditions. A well-installed 2kW diesel heater uses just 0.1-0.28 litres per hour, which makes it cost-effective for long-term use.
Heater Installation Guide
The mounting location is vital for the best performance. We installed the heater with a turret plate and proper sealing to keep exhaust fumes out of the living space. The fuel pump needs a 15-30 degree angle position to work at its best.
Fuel Consumption
These heaters shine when it comes to daily use. A 2kW heater runs 6-8 hours with just one litre of diesel, while a 5kW unit needs about 0.5 litres each hour. Most users spend £6-8 weekly on fuel during winter.
Safety Considerations
Safety is the top priority when operating diesel heaters. These safety measures are essential:
- Carbon monoxide detector installation
- Proper exhaust pipe routing away from windows
- Regular maintenance checks
- Adequate ventilation system
Winter Usage Tips
The exhaust pipe should slope downward gradually to stop condensation buildup in winter. Running the heater at full power at first helps reach your desired temperature quickly. A steady temperature works better than switching the heater on and off frequently.
Important: Good ventilation is a must and the cooling cycle should complete before cutting power.
Ventilation System

Image Source: The Van Conversion
Quality air in your off-grid campervan depends on proper ventilation. A well-laid-out ventilation system will give a comfortable living space by removing excess moisture, controlling temperature, and keeping fresh air moving.
Roof Vent Options
You can choose from several modern roof vent options based on your needs. Natural airflow comes from passive ventilation systems like wind-driven vents that work without power. The Maxxair Maxxfan Deluxe is a powerful active ventilation option that moves up to 900 CFM of air at adjustable speeds.
Installation Process
Your roof vent installation needs to be precise and properly sealed. Start by picking the right spot, usually on a higher roof ridge so water flows away from the vent. You’ll need a 72-92mm hole saw to make the perfect opening and self-drilling screws to mount the vent base. A watertight seal is vital – wrap butyl tape around the vent base to stop any leaks.
Airflow Management
Smart vent placement is the key to managing airflow effectively. Your best setup puts intake vents low and exhaust vents high, which creates natural air circulation through convection. Adding floor-level ventilation to your roof vent will boost air exchange significantly.
Modern ventilation systems come with programmable thermostats and remote controls that make adjusting airflow easy. These advanced units switch between intake and exhaust modes, so you retain control over your campervan’s environment.
LED Lighting Setup

The right LED lighting setup will change your off-grid campervan’s interior while using minimal power. LED lights work at peak efficiency and use just 1-3 watts per bulb compared to old-style 15-watt halogen bulbs.
Battery-Efficient Lighting
LED lighting saves a lot of power and works at high levels without draining your leisure battery. These lights need very little electricity. A complete van setup uses less than 10 watts of power while giving you the same light as 100 watts of halogen lighting.
Installation Tips
LED installation depends on your fixture type, but proper wiring is vital. You need to connect positive and negative wires through a 12V fuse block with an inline fuse rated at 5-10 amps. Lever nuts are the most secure way to join different wire gauges, especially when you have 22AWG LED wires connecting to 12AWG main lines.
Light Placement Guide
Smart light positioning will give you the best illumination throughout your van. These brightness guidelines work well:
- Bedrooms and living spaces: 300-500 lumens per square metre
- Kitchen and task areas: 500-800 lumens per square metre
You can mix different LED types to get complete coverage. Recessed puck lights are great for general illumination, and strip lights work well under cabinets. Your choice of colour temperature changes the mood by a lot – warm white (2700K-3000K) creates a cosy feel, while neutral white (4000K) gives better visibility in task areas.
Inverter System

Converting DC power to AC is significant to power household appliances in your off-grid campervan. Pure sine wave inverters produce cleaner power output with less than 3% harmonic distortion. This makes them ideal for sensitive electronics.
Choosing the Right Size
Your total power requirements determine the sizing. The inverter’s capacity should handle the combined wattage of simultaneously used appliances plus a 20% safety margin. You’ll achieve optimal efficiency by selecting an inverter that operates at 50-75% of its maximum capacity. A 2000W inverter delivers these specifications:
- 15 amps continuous AC power
- 3000W surge capacity for motor startup
- 90% power conversion efficiency
Installation Guide
The right installation needs proper placement and adequate ventilation. You should mount the inverter in a cool, well-ventilated spot and keep it away from the battery bank. The inverter connects to busbars using appropriately sized cables – 55mm² wire suits most installations.
Power Management
Smart power management enhances system efficiency. Pure sine wave inverters achieve 90-98% efficiency, while modified sine wave alternatives reach 75-85%. The efficiency changes based on load – system performance decreases when running at very low or maximum capacity.
Modern inverters come with advanced features like automatic eco-mode that activates when load drops below preset values. Bluetooth connectivity allows up-to-the-minute power consumption tracking and ensures optimal system performance.
4G Router & Outdoor Antenna

A reliable communication system is crucial to your off-grid campervan adventures. A mobile signal booster takes weak signals and makes them stronger, which gives you a continuous connection in remote areas.
Coverage Enhancement
Today’s signal boosters show impressive results by making phone signals up to 32 times stronger. The system works through three main parts:
- External antenna that catches weak signals
- Amplifier unit that processes signals
- Internal antenna that spreads the boosted signals
These quality boosters work with all major UK carriers like EE, O2, Vodafone, and Three.
Installation Process
You need to place each component in the right spot. The external antenna should go on your van’s roof toward the back, at least 12 inches away from windows and other antennas. The external and internal antennas need proper spacing to avoid feedback loops.
The best way to run cables is through the door edges’ weather-stripping seals. Your amplifier unit will work best in a spot with good airflow, such as under a seat or close to the front console.
Performance Tips
The internal antenna works best when it sits 18-36 inches from where you’ll use your mobile devices. Your camping spot’s signal strength matters too – boosters need some existing signal to work effectively.
The system adapts to outside signal strength through automatic gain control. Regular maintenance checks help you get consistent performance, and LED indicators let you track how well the system runs.
Smart Battery Monitor

Battery monitoring plays a key role in managing off-grid campervan power systems. Smart battery monitors work just like your vehicle’s fuel gauge and show you exactly how much power you have left and how you’re using it.
Battery Health Tracking
Modern battery monitors give detailed insights through advanced shunt-based measurement systems. The Victron SmartShunt, to name just one example, measures current flow with precision up to 500A. These devices track several parameters such as voltage, current draw, and remaining capacity in amp-hours.
Usage Optimisation
Smart monitoring helps you manage power through immediate data analysis. Modern monitors calculate your remaining time based on how you use power. Your smartphone connects to these devices through Bluetooth and shows:
- Battery voltage and current flow
- State of charge percentage
- Power consumption history
- Temperature monitoring
- Remaining runtime estimates
Installation Guide
The right installation of a battery monitor demands attention to detail. You must mount the shunt between the battery’s negative terminal and all loads. The process involves connecting the shunt to your battery’s negative terminal and routing all negative cables from appliances to the system side of the shunt.
The monitor’s display unit should sit where you can easily see it, and many modern units come with cables up to 8 metres long for flexible positioning. Bluetooth-enabled monitors make things even simpler by showing all information on your smartphone without needing a physical display.
Propane System

A good propane system is essential for cooking and heating in an off-grid campervan. The system should meet British Standards Institution regulations to operate safely.
Tank Options
Propane tanks are available in many sizes. Most off-grid campervans use 20-pound vertical tanks that measure 12.25 inches in diameter and 17.75 inches in height. Aluminium tanks provide a lighter alternative, while composite tanks let you see the gas levels clearly.
Safety Features
Modern propane systems come with several safety features built-in. An overfill protection device stops filling at 80% capacity. The system has:
- Automatic shut-off valves to prevent leaks
- Pressure relief mechanisms to protect the tank
- Excess flow valves that limit gas flow during major leaks
- Built-in leak detection with distinctive odour additives
Installation Requirements
The tank needs a sealed compartment with a 50mm upstand at low level. A drop-out vent sized at 2% of the floor area provides necessary ventilation. All gas components should stay clear of electrical systems.
Usage Guidelines
The tank must stay upright and secure with high and low-level straps for safe operation. The system requires testing at 5x working pressure with a monometer. The maximum acceptable pressure loss should not exceed 5 mbar. Regular maintenance checks help ensure the system works safely throughout its lifetime.
Insulation Kit

Good insulation is the foundation of temperature control in off-grid campervans. The right insulation kit can cut heat loss by up to 60% during winter. Your van’s internal temperature will stay 15°C cooler than outside in summer.
Material Options
Thinsulate, Polyiso, and Havelock Wool are the best insulation materials for off-grid campervans. Thinsulate has an R-value of 3.3 per inch and works great at reducing noise while resisting moisture. Polyiso boards give you better thermal resistance with an R-value of 5.6 per inch at 75°F, making them a perfect choice for walls and ceilings.
Installation Process
Start by cleaning the van’s metal surfaces completely. Thinsulate needs 3M 90 spray adhesive to stick properly, while Polyiso boards require mechanical fixings or special adhesive. Watch out for thermal bridges – these are spots where metal frames can conduct heat through your insulation.
R-Value Considerations
Material thickness and temperature affect R-value performance. Polyiso works best at moderate temperatures but becomes less efficient below 15°C. You’ll get the best results by mixing different materials – rigid boards for large surfaces and flexible Thinsulate for tricky spaces.
Good ventilation helps prevent condensation buildup behind insulation panels. Cover all metal surfaces completely to get the best thermal performance. Pay extra attention to wheel arches and door panels.
Grey Water System

Grey water management is key to keeping your off-grid campervan clean and hygienic. A well-installed system will give you a comfortable journey and protect the environment too.
Tank Installation
The grey water tank just needs precise positioning. You’ll need to mount it above the wheel arch with BoatBuckle Kwik-Lok Tie Downs and stainless steel D-rings. We installed a wood support that runs the full height of the tank to balance any bow when it’s full. Make sure the tank has enough clearance so you can empty it easily.
Disposal Methods
Taking care of disposal helps protect our environment. You should empty grey water at designated spots or approved campsites. Never dump grey water into watercourses, surface drains, or groundwater. Your system should have a quick-disconnect mechanism for portable tanks that makes it easy to transport to disposal points.
Maintenance Tips
Regular upkeep will stop odours and make your system last longer. A good cleaning routine has:
- Bio washing liquid and hot water after every third trip
- Clean plates and cutlery before washing to keep tank residue low
- Eco-friendly cleaning products to avoid harmful chemical buildup
You can also add a food-grade hose to clean quickly. Empty the tank when it’s about two-thirds full to stop backup into sinks or shower trays. The system ended up staying odour-free when we left the tank tap open while not in use.
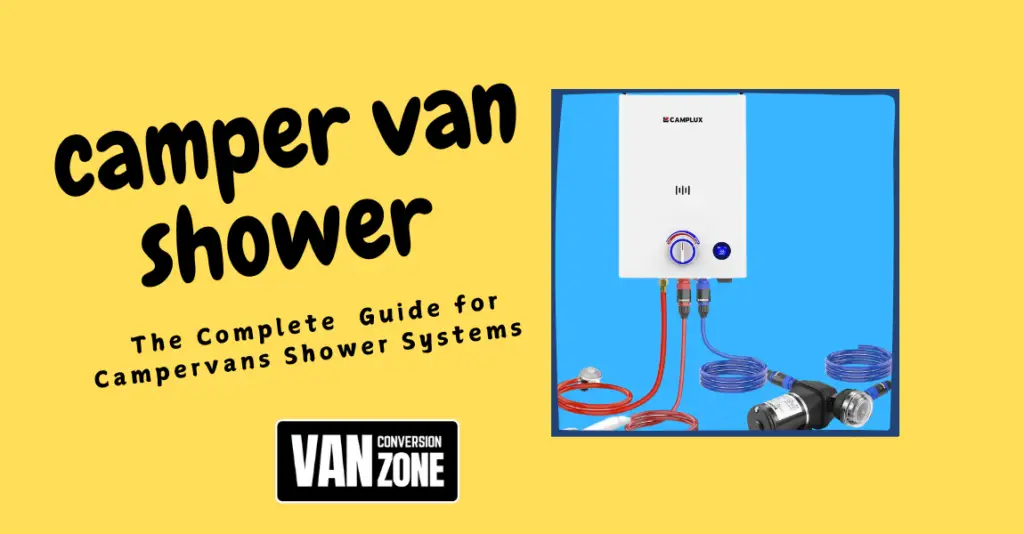
Portable Shower Setup

Portable showers have transformed personal hygiene in off-grid campervans. These systems provide flexibility without permanent installation needs. A USB-powered shower system maintains steady water pressure through a submersible pump and draws just 0.1 amp of power.
Water Conservation
Smart shower management makes a huge difference during extended off-grid stays. A typical portable shower system uses:
- 6-9 litres per minute for tankless systems
- 3-6 litres per minute for USB-powered units
- 5-10 litres total for a quick rinse
Installation Guide
A portable shower setup needs few tools but careful planning. The process starts with mounting a shower head hook on the back door or ceiling. A hoola-hoop mechanism supports hanging shower curtains and creates a private shower space. A collapsible bucket placed underneath collects water efficiently.
Usage Tips
The right water temperature ensures the best shower experience. A 1.5kW immersion rod takes about 9 minutes to heat 10 litres of water. Gas-powered systems heat water right away and reach temperatures up to 122°F.
Year-round usage works best with a mixed approach. Solar shower bags heat water naturally in 3-4 hours during summer months. Powered heating solutions work better in cold weather. USB-powered systems stand out with their versatility and provide enough pressure to clean both people and gear.
Security System

Your valuables need protection during off-grid adventures. Modern security systems blend cameras, smart alarms, and remote monitoring features to keep your mobile home safe.
Camera Options
High-definition security cameras provide complete surveillance with 4K resolution and 360-degree coverage. These cameras capture clear footage in colour at night, which works well even in dark conditions. We tested battery-powered options like the Reolink Argus 4 Pro that delivers 4K Ultra HD resolution with ColorX technology and maintains a 180° view without blind spots.
Alarm Features
The latest alarm systems protect your vehicle at multiple levels. You get six different security features:
- Vibration and noise sensors
- Geofencing capabilities
- Wi-fi fence monitoring
- Door sensors
- 115dB siren
- Pre-warning alert horn
These systems stay watchful without draining power and use minimal current from your leisure battery.
Remote Monitoring
Smartphone integration has changed how campervan security works. Current systems alert you through text, call, and dedicated apps when they detect threats. Cellular-enabled cameras keep you connected while you travel and store video clips locally when network coverage isn’t available.
New monitoring systems come with dual-zone shock sensors and full perimeter control to protect both cab and load areas. They work with factory key fobs and blend with your existing security setup.
Emergency Backup Kit

Safety in off-grid campervan adventures depends on how well you prepare for emergencies. Your lifeline in unexpected situations will be a complete emergency backup kit.
Essential Tools
A good tool kit is the foundation of emergency preparedness. A quality socket set with different sizes is a great way to get mechanical repairs done. Battery problems are systemic in remote locations, so keep jumper cables or a portable jump starter available. A high-visibility jacket and warning triangles will improve your safety during roadside stops.
First Aid Supplies
Your first aid kit needs regular updates and specific items. The kit should contain:
- Sterile cleansing wipes and washproof plasters
- Dressings and scissors
- Nitrile powder-free gloves
- Resuscitation face shield
- Instant cold packs and antibiotic ointment
Emergency Protocols
Emergency preparation goes beyond just having the right equipment. We created an emergency contact list and kept it where everyone could find it. You should assess the situation calmly if you run into trouble and place your warning triangles 45 metres behind your vehicle. A hand-crank weather radio helps you stay informed about weather conditions, and a portable water philtre will give a steady supply of clean drinking water.
Your kit needs a fire extinguisher rated for all fire types. A marine-grade extinguisher within reach protects against fires of all types. Emergency food supplies with a long shelf life will keep you fed during extended stops.
Comparison Table
| Equipment | Power Consumption | Key Specifications | Installation Requirements | Maintenance Needs |
|---|---|---|---|---|
| Solar Power System | Gets up to 6 amps daily | Monocrystalline panels with 40% higher efficiency | 25mm air gap beneath panels, angle equals geographical latitude | Clean panels regularly, check connections |
| Portable Power Station | 300W-2000W capacity | Pure sine wave output, multiple USB/AC outputs | Place in ventilated area away from heat | Battery life: 3,000+ charges |
| Water Filtration System | Not mentioned | Removes particles down to 5 microns | Install after water pump near sink | Replace philtres every 35 days |
| Composting Toilet | 0.1 amp (fan) | Separate liquid/solid waste chambers | 1.3m clearance height with external ventilation | Empty liquids every 3-4 days, solids after 30-60 uses |
| 12V Refrigeration | 24-80Ah per day | Power usage varies with temperature | Good ventilation away from sun | Clean vents, pre-cool items |
| Diesel Heater | 0.1-0.28L/hour fuel usage | 2kW-5kW heating capacity | Fuel pump at 15-30° angle with proper exhaust | Check regularly, monitor carbon monoxide |
| Ventilation System | Up to 900 CFM airflow | Intake/exhaust modes, programmable thermostat | 72-92mm roof opening with watertight seal | Clean philtres, check seals |
| LED Lighting Setup | 1-3W per bulb | 300-800 lumens/m² coverage | 12V fuse block with 5-10 amp inline fuse | Minimal upkeep needed |
| Inverter System | 90-98% efficiency | 2000W typical capacity, 4000W surge | Cool area with 55mm² wire connections | Check efficiency regularly |
| Cellular Signal Booster | Not mentioned | Up to 32x signal amplification | Keep 12-inch away from windows | Check LED indicators |
| Smart Battery Monitor | Not mentioned | Up to 500A measurement capacity | Place between battery negative and loads | Monitor through app |
| Propane System | Not mentioned | 20-pound vertical tanks standard | Sealed compartment with 50mm upstand | Test for leaks, check pressure |
| Insulation Kit | Reduces heat loss by 60% | R-value: 3.3-5.6 per inch | Clean surfaces with mechanical fixings | Watch for moisture |
| Grey Water System | Not mentioned | Tank above wheel arch | Support with wood across tank | Empty at 2/3 capacity, clean regularly |
| Portable Shower Setup | 0.1 amp (pump) | 3-9L/minute flow rate | Install shower head hook and curtain | Clean water tank regularly |
| Security System | Minimal draw | 4K resolution, 360° coverage | Place multiple sensors | Test system regularly |
| Emergency Backup Kit | Not mentioned | First aid, tools, jump starter | Store in easy-to-reach area | Update supplies regularly |
FAQs
Q1. What are the essential power components for an off-grid campervan? The key power components include a solar power system with monocrystalline panels, a portable power station with pure sine wave output, and a smart battery monitor. These work together to generate, store, and manage electricity efficiently for extended off-grid stays.
Q2. How can I ensure proper water management in my campervan? Proper water management involves installing a water filtration system to remove contaminants, setting up a grey water system for responsible waste disposal, and using a portable shower setup with water-saving features. Regular maintenance of these systems is crucial for hygiene and conservation.
Q3. What heating and cooling solutions work best for off-grid campervans? For heating, a diesel heater is highly efficient, using minimal fuel while providing ample warmth. For cooling, a combination of proper insulation, a 12V refrigeration system, and a well-designed ventilation setup with roof vents can help maintain comfortable temperatures without excessive power consumption.
Q4. How can I enhance security in my off-grid campervan? Enhance security by installing a comprehensive system that includes high-definition cameras with night vision, multi-level alarms with various sensors, and remote monitoring capabilities. Additionally, always keep an emergency backup kit with essential tools and supplies for unexpected situations.
Q5. What are the most energy-efficient lighting options for a campervan? LED lighting setups are the most energy-efficient option for campervans. They consume only 1-3 watts per bulb while providing ample illumination. Strategic placement of different LED types, such as recessed puck lights and strip lights, can create optimal lighting throughout the van while minimising power usage.